Notification System
The Work object is now capable of sending Slack notifications to both users and channels. The notifications can be triggered in two ways: the completion of a Work object, or a Work submitted to the 'notify' pipeline. In both cases the Work must have a valid notify configuration.
Overview of notify configuration
Work['notify'] = {
  'slack': {
    'channel_id': None,  # Valid Slack config must have a channel_id,
    'member_ids': None,  # or at least one member_ids set.
    'message': None,  # A written message to be displayed.
    'results': None,  # Boolean to display results or omit them.
    'products': None,  # Boolean to display list of products or omit them.
    'plots': None,  # Boolean to display list of plots or omit them.
    'blocks': None,  # Customise message using Slack Blocks.
    'reply': None,  # Sending status of message.
  },
}
Usage
Define a Work
First define a simple Work object with the basic required fields populated.
from chime_frb_api.workflow import Work

# Note: When using the notify pipeline, the 'site' must be 'chime'.
work = Work(pipeline="notify", user="tester", site="chime")
Configuration for Slack
Below is an example configuration for sending a Slack message to both a channel and a member.
# If both the channel_id and member_ids are defined the message will go to both. However,
# at least one of these MUST be defined.
work.notify.slack.channel_id = "A1B2XY9Z" # Not real
work.notify.slack.member_ids = ["BD31SV4S"] # Not real
# Tip: If you want to use emojis you can draft your message in Slack then copy/paste it.
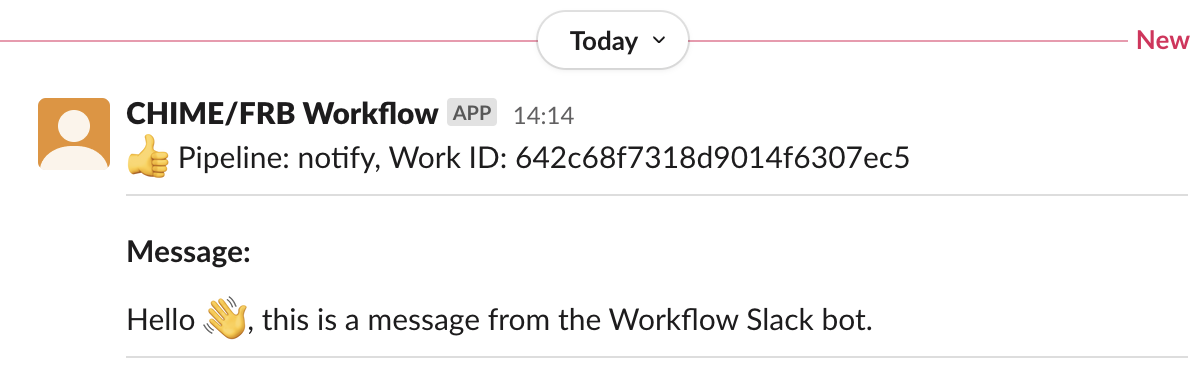
work.notify.slack.message = (
"Hello :wave:, this is a message from the Workflow Slack bot."
)
# products, plots, and results all behave the same, so here we'll only define one, but
# all of them can be used simulataneously.
work.notify.slack.products = True
# Since the products is currently None lets define that.
work.products = ["test_file.dat"]
The configuration for work.notify.slack.blocks can be quite involved since it uses
Slack's Block Kit. For more info on Block Kit, please visit
https://api.slack.com/block-kit. An interactive Block Kit builder is also available to
help you use it without having to learn https://app.slack.com/block-kit-builder/.
Result of the example above
Finding Slack channel and member ids
Channel ID
-
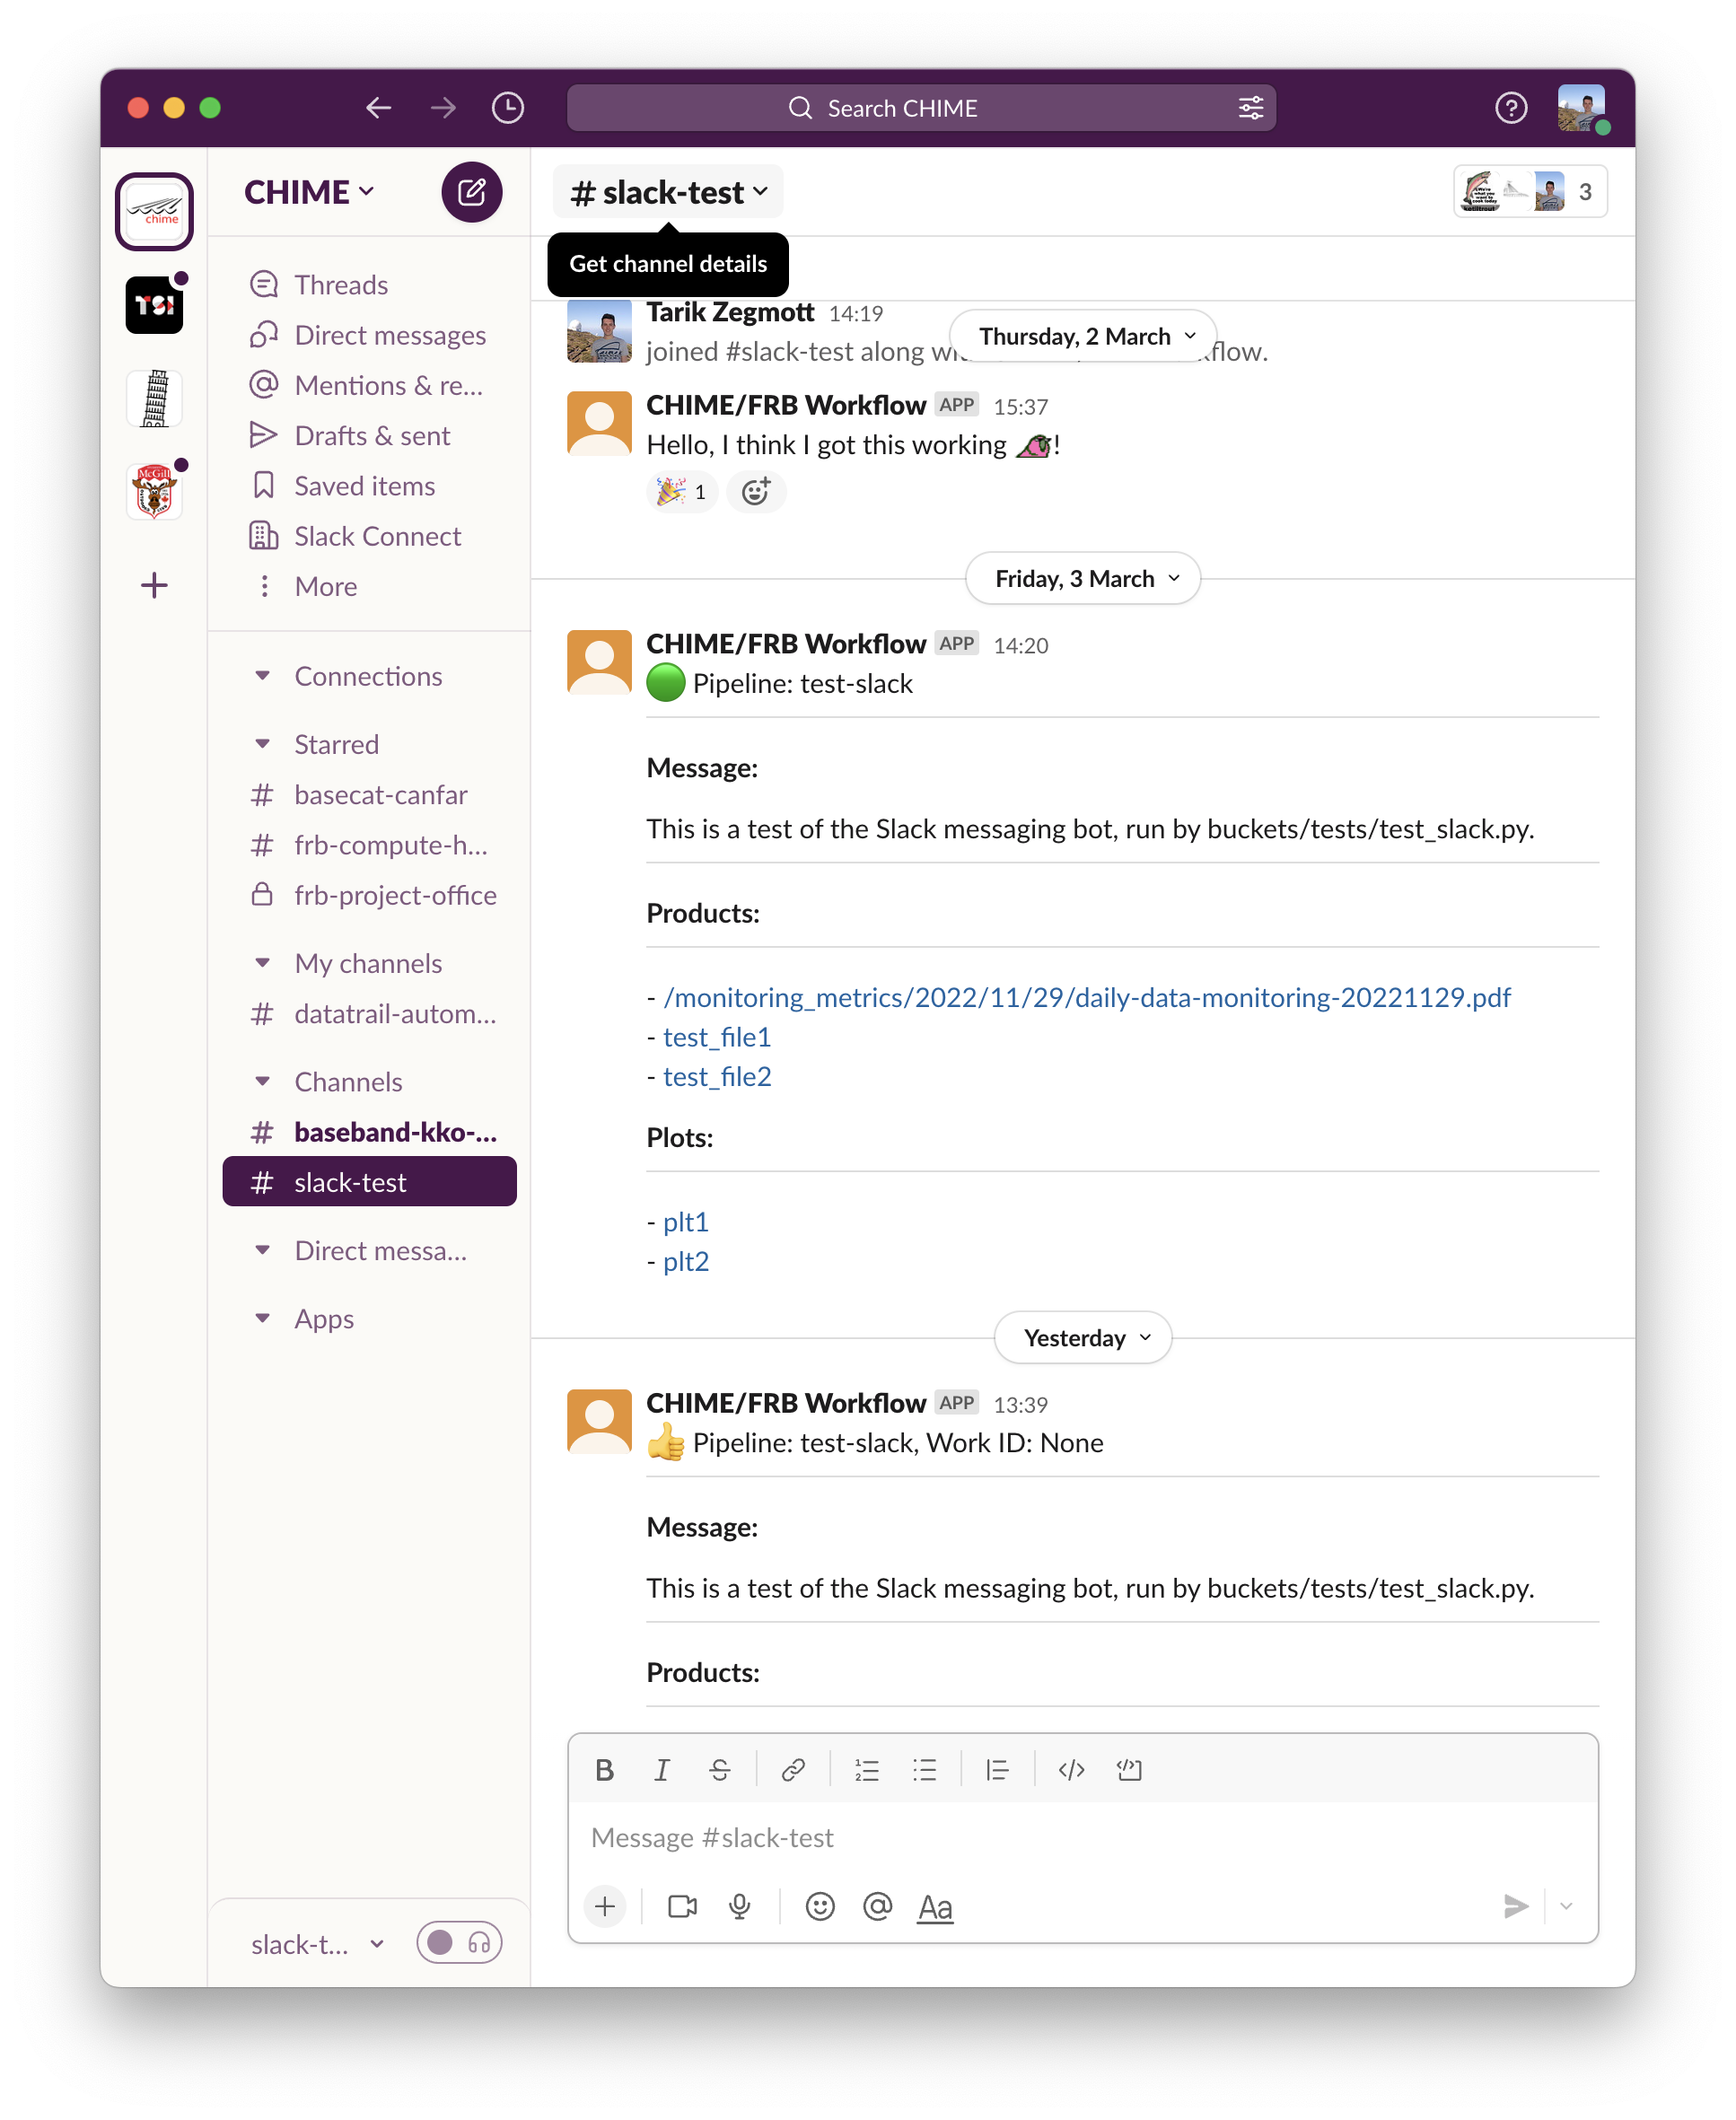
Navigate to the channel you wish to post to.
-
Click on the channel's name near the top of the window to get more information about it.
Image: Obtaining Channel info.
-
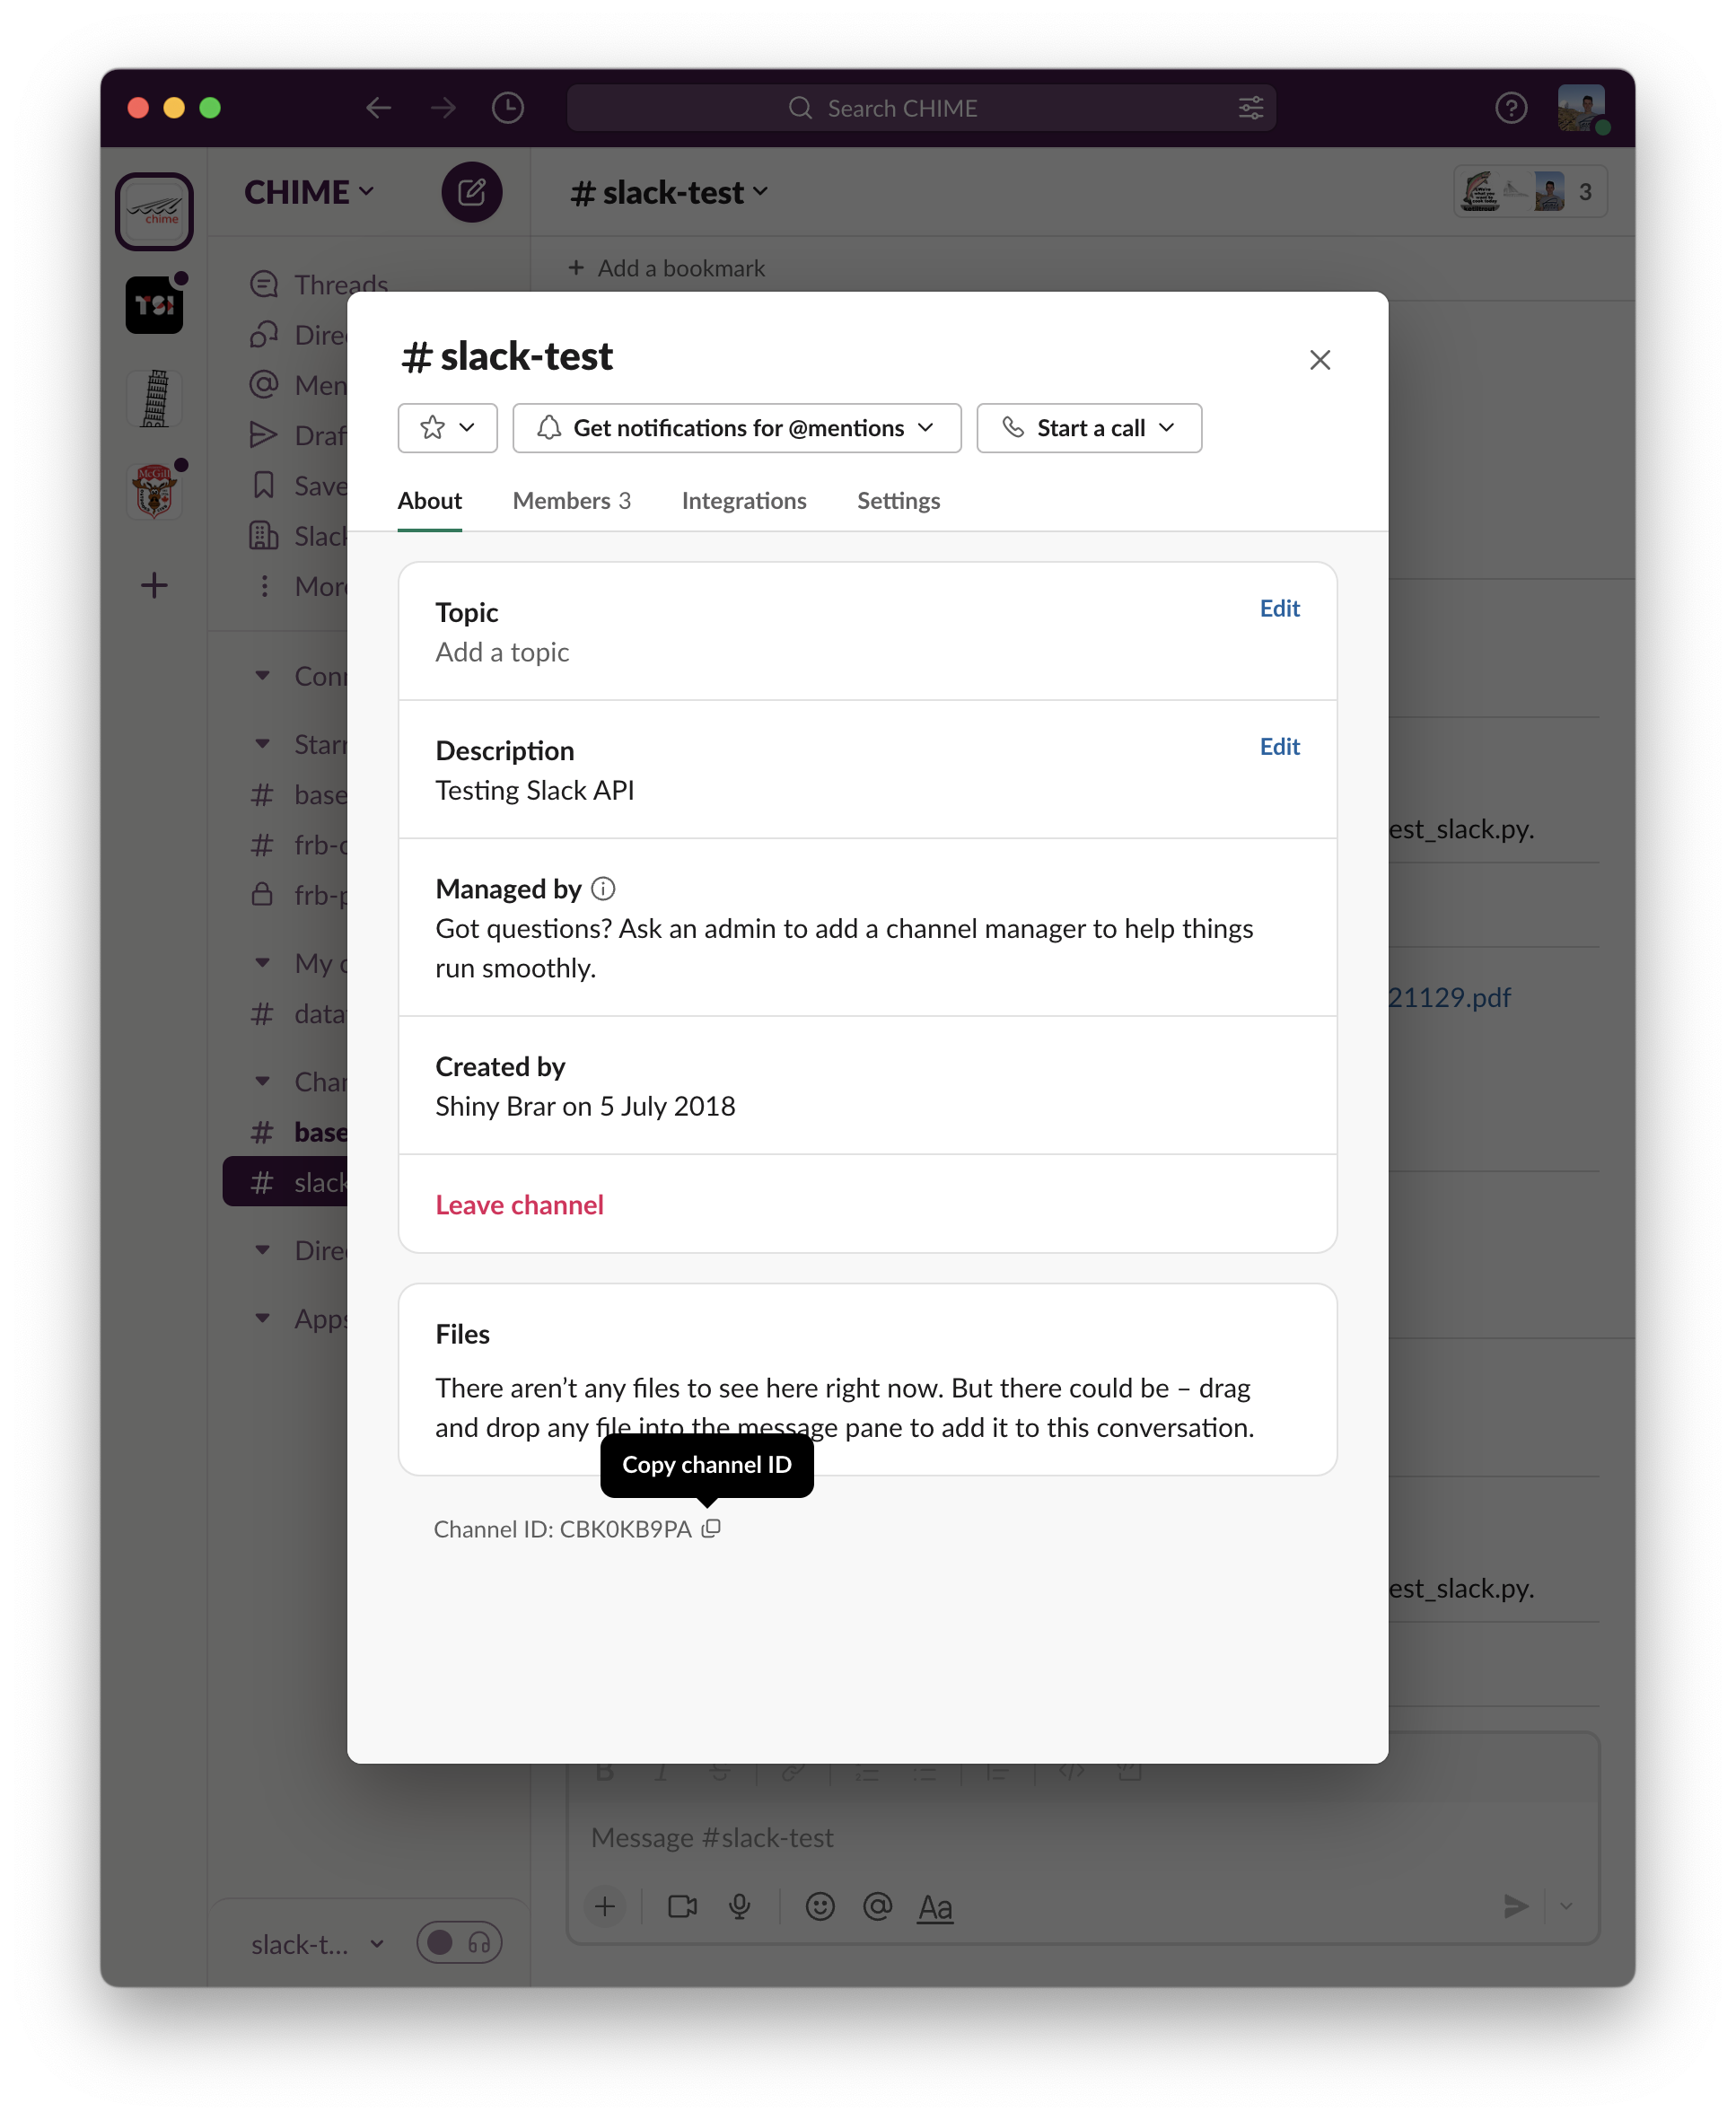
The channel's id will be shown at the bottom of the pop-up, clicking on it will copy it the the pasteboard.
Image: Channel info pop-up.
Member ID
-
Use the Slack search bar navigate to the chat page with the user you wish to send a message to.
-
Click on the user's name to bring up their Profile.
-
Click the button with the three vertical dots.
-
Select the "Copy member ID" option to copy the ID to the pasteboard.